 It’s a simple way to buy a “ready to fly” arrow and have the local store cut it to the right size and install the insert.
It’s how I used to buy all of my arrows, but I started to realize that there were always 2 or 3 arrows out of each dozen that didn’t fly as well as the others.
A few years ago I started building my own arrows from raw shafts and carefully selected components, and the improvement in quality has been well worth the effort.
It takes a little bit of time, but it’s not terribly difficult and doesn’t necessarily require a lot of specials tools.
Besides the satisfaction of knowing that I’ve done everything the right way, I have noticed that I typically get 12 good arrows out of every dozen now.
I’m not going to detail every single aspect of arrow building in today’s post, but I am going to share my typical “workflow” for prepping and assembling arrows from shafts, and hopefully share a few tricks that I’ve learned, which yield the best results.
Cutting The Shafts
I don’t own an arrow saw. I’ve often thought about buying one, but they’re not cheap. It’s hard to justify the initial investment when my local shop will cut a dozen arrows for $3. You can build an arrow saw at home, which is probably something I should do.
If you are cutting your own arrows, be sure to rotate the shaft as it’s cut, so that you get the cleanest and straightest cut as possible. And if you’re using carbon shafts, be sure that you use a high-RPM saw and a blade that suitable for cutting through the carbon.
Quick Tip: You’ve probably noticed that you can buy arrow shafts with different straightness tolerances.
The lower quality arrows tend to have their straightness variations at the end of the shafts, so you can typically improve an arrow’s straightness by cutting off even amounts from each end. This works best for those of you that use shorter arrows.
Say, for example, that you start with a 32″ raw shaft, and you need a 28″ arrow – instead of cutting 4″ off of the front, cut 2″ off of each end, and you’ll end up with a straighter arrow.
Squaring The Shafts
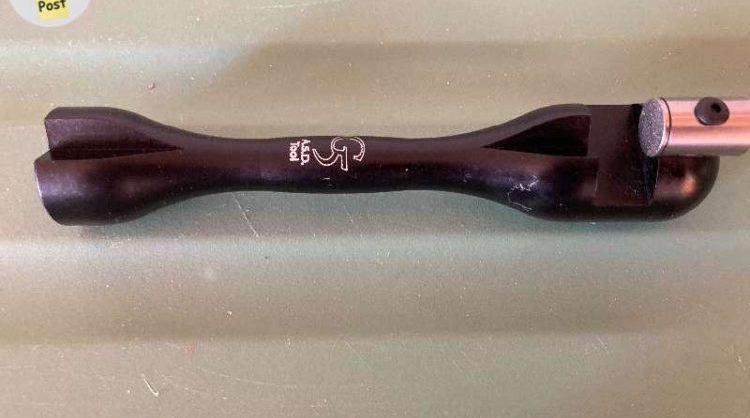
Even if you are very careful when you cut your shaft, the cut probably isn’t perfectly square. I use the G5 Arrow Squaring Device (ASD) to square both ends of my shafts after they are cut.
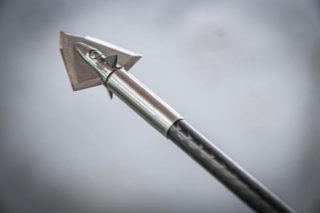
I use a Sharpie to mark both ends of the cut shaft and then use the ASD to “shave” the arrow ends until all of the Sharpie marks are gone on each end. Squaring the shafts will ensure that your inserts and nocks seat perfectly flush in the arrow shaft, which means that your arrow is straight, and the broadhead or field point you screw into the arrow will be perfectly aligned.
Cleaning The Shafts
The process of cutting and squaring your arrows will result in a lot of material debris on, and in, the arrow shaft. This debris can cause adhesion issues when it comes to installing your components. A simple way to clean the shafts is to wipe the outside of them down with a damp paper towel, and then use a damp q-tip to clean the inside of the arrow shaft. Be sure to clean the first inch inside either end of the shaft, which is where your components will be seated and glued.
Choosing The Components
At the very least, you will have inserts and nocks to install in your arrow shaft. You also might have a bushing for your nock, especially on larger-diameter target shafts. Before I install my components I do two very important things to make sure that my arrows will be as accurate as possible.
First I weigh each raw arrow shaft and order them from lightest to heaviest. If you have good arrows and have followed a good process thus far, then you shouldn’t have many variations.
Next I weigh each insert and order them from lightest to heaviest. I will also do the same for the nocks and nock bushing/inserts, if applicable.
Now that I have all of my pieces weight-sorted, I combine the lightest arrow shafts with the heaviest components, thereby trying to offset the variances on either side. I try to ensure that each assembled arrow will weigh the same as all of the others. I will “dry fit” all of the components to each shaft (matching the light/heavy pieces) and then weigh each arrow to see if I’ve gotten rid of as much variance as possible.

You may think that process is overkill, but the weight-matching isn’t the only reason I do it. The process of “dry fitting” the components to the shafts is also important.
You’ll notice that some components may fit loose or too snug with particular arrow shafts.
If you skip the dry-fitting process and go straight to gluing in components, then you may find yourself with an insert that will only go halfway into shaft, but is now stuck because the glue is setting up so quickly. In that case, you just ruined an arrow – and probably threw away about $10!
Putting It All Together
Alright, so now you have a cut, squared, and clean shaft, as well as weight-matched and dry-fitted components.
You’re ready to build!
There is plenty of specialties, “job-specific” adhesives on the market. However, I use the relatively cheap and easily accessible super glue from Gorilla Glue to install my components in my arrow shafts. A little bit goes a long way and I haven’t had any problems with long-term durability.
Here’s a couple of simple, quick tips for installing your components.
To make handling the components easier, install a field point into the arrow insert. This will allow you to avoid depositing oils from your hands onto the clean components (which could cause adhesion issues), and it also helps you avoid getting glue all over your fingers during installation.
Finally, be sure that you twist the insert into the shaft as your gluing it in. This twisting motion will distribute the glue through the shaft, which gives you the most contact and therefore the strongest hold.
All Done!
So now you have turned a raw shaft into an arrow that’s built with precision. You know it’s straight, and you know it’ll hold up. Obviously, we’re missing a major component – fletching! – but that’s another topic for another day.
Any questions? Fire away…