What Is Paper Tuning?
“Paper tuning” is the process of shooting an arrow through a piece of paper from a bow.
The impact of the arrow and the tearing of the path can reveal the key factors of the combined shooting of the bow and arrow.
By shooting an arrow on the paper, you will be able to see where the tip of the arrow makes the initial impact on the paper, how the shaft of the arrow continues to tear the paper as it flies, and is further torn by the blade or feather of the arrow, and finally torn.
What you want to see is one hole – When the front of the arrow tears on impact, then the rest of the shaft goes straight through so that the paper is no longer torn.
Why You Should You Paper Tune Your Bow (and Arrows!)
The paper tuning process will help ensure that your bow and arrow are set correctly and complement each other to get forgiveness and accuracy down range.
If you can get good paper tears, then you will save time sighting in, making adjustments, and broadhead tuning later.
Some people mistakenly believe that paper tuning is only something you do when you get a new bow.
But more than that, paper tuning should be done when you make any changes to your rest, nocking point, and most importantly – your arrows.
What Do You Need To Paper Tune At Home?
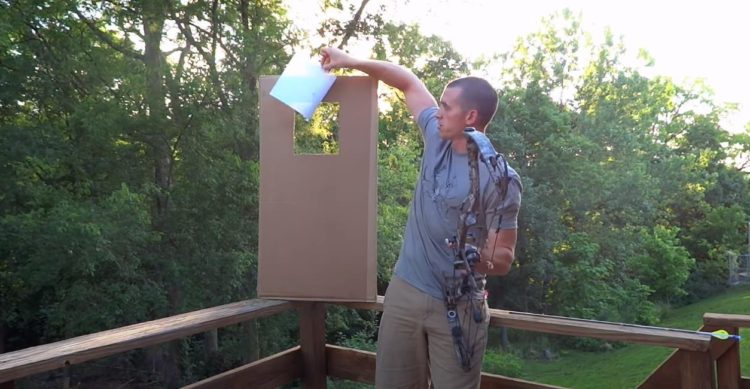
There are numerous ways to build or buy a stand that’s single purpose is to allow you to paper tune. I’ve never found the investment of time or money worthwhile, so I have come up with a simple paper-tuning rig of my own – a box.
Cut a small hole in the front of the box than the standard paper, and then cover the hole with a piece of paper.
Cut a larger hole in the opposite end of the box (there’s no reason to shoot your arrow through the cardboard on the backside and risk damaging your fletching).
Place the box in front of your bow target, leaving enough room in-between the two so that your arrow passes completely through the paper before it impacts the target.
Stupid easy, right?
What Distance Should You Paper Tune From?
There are many opinions on this topic, and there’s no one right answer. I typically start paper tuning in the 5-7 yard range, but will often move closer/further once I think I have my bow and arrows tuned the way that I want.
If you shoot too close to the paper, then the arrow may not have time to stabilize out of the bow; if you shoot too far, then the fletching can correct flight flaws that you would otherwise see as tears through the paper.
Before You Begin
You’ll pull your hair out trying to paper tune if you’re not attempting to tune your bow with the right arrows.
Arrow selection is critical to paper tuning, and even more important for forgiveness and accuracy downrange – especially with broadheads.
If you want to verify that you have the right arrows, then refer to this article: Understanding Arrow Spine – What Arrow Do You Need For Your Bow?
You also want to make sure that you have set your bow up so that the center-shot is in spec and the nocking point is level.
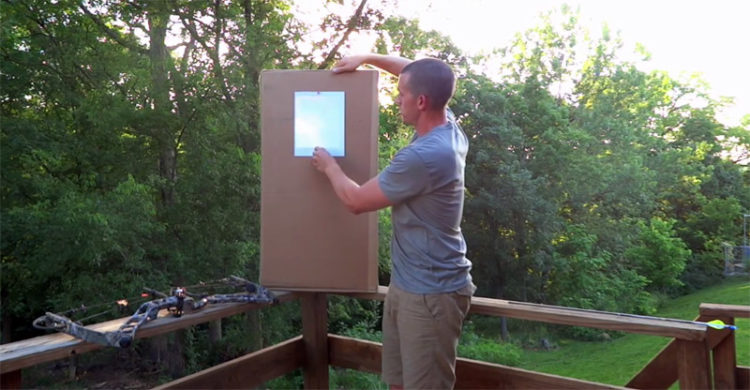
Next, you want to make sure that your newly created Super Paper Tuner 2020™ – aka, “the box” – and target are high enough off the ground so that you can shoot parallel with the ground.
I often set my target on a shelf in my garage and set my box on a sawhorse in front of that.
If you can’t find a spot that’s high enough, then consider kneeling to shoot – just make sure that you aren’t leaning or shooting at an up/down angle, which will skew the angle that your arrow passes through the paper and give you false results.
Also be sure that you’re using a proper grip on your bow, avoiding torque, and that you’re holding the bow level on the vertical plane.
If you already have a sight on your bow, then keep an eye on the level bubble.
Time to Shoot (Again, and again…)
Alright, so you’ve done all of the above and you shoot your first arrow through the paper. You see a tear and you want to fix it, but don’t! At least not yet.
Be sure to shoot at least 3 arrows through your paper and verify that you’re getting repeatable tears. “False tears” might occur due to flaws in your shooting, so be sure you have consistent tears before you start messing with your bow or arrows.
If you absolutely cannot get repeatable tears then have someone else try to shoot your bow and see how it responds.
Finally, mysterious or inconsistent tears can be signs of clearance/contact issues; be sure that your arrow is not touching the bow’s cables, rest, or riser at it is released.
Double-check things like your cable/roller guard rod for cable clearance, and drop-down rest timing for launcher arm clearance.
Understanding Your Tear
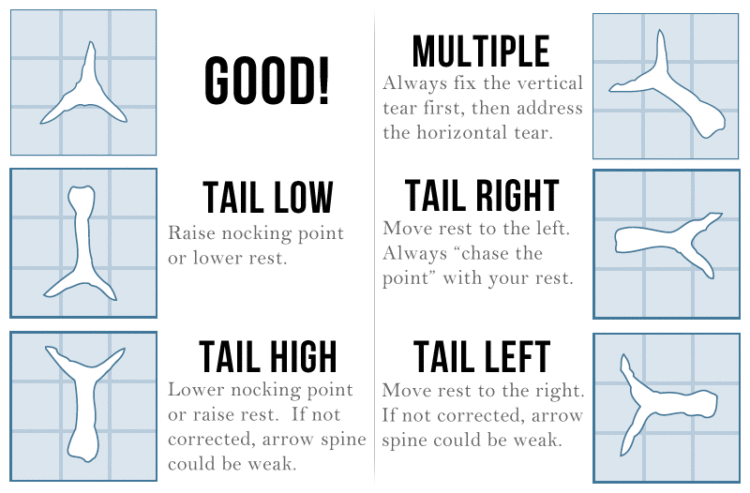 Alright, so now we have a repeatable tear to work with. Consult the chart above for a quick overview of what each type of tear means.
For a more in-depth look at understanding and resolving paper tuning tears, you should definitely check out Easton’s Tuning Guide (PDF). This guide is an essential resource if you want to understand bow and arrow tuning and setup.
Remember to correct any vertical tear before trying to resolve a horizontal tear.
A note to the left-handers (like myself): Much of the adjustments mentioned above are relevant for you, too, but in terms of weak spine indication you’ll likely see a tail-right tear, as opposed to a tail-left tear indicating a weak spine for right-handers.
Bow Adjustments
The adjustments that you make to your bow to resolve paper tears typically begin by adjusting your rest to the left/right.
When doing so, remember that you want to “chase the point”.
If your point is impacting the left and your fletching is tearing off to the right, then you want to move your rest to the left.
However, be sure that you don’t move your rest so far that you leave what the manufacturer recommends for center-shot settings.
Other bow-based adjustments might include adding/removing twists to bows equipped with a split-yolk harness system, or adjusting the cable guard or roller guard rod to increase or decrease tension on the cables at full draw. (These advanced techniques are unique to specific bows and cannot be covered in this overview.)
If your left/right tear isn’t resolved while your rest’s center-shot is in spec, then address the spine of your arrow by increasing draw weight (to “weaken” an arrow), or decreasing draw weight (to “stiffen” an arrow that’s reacting too weak).
Arrow Adjustments
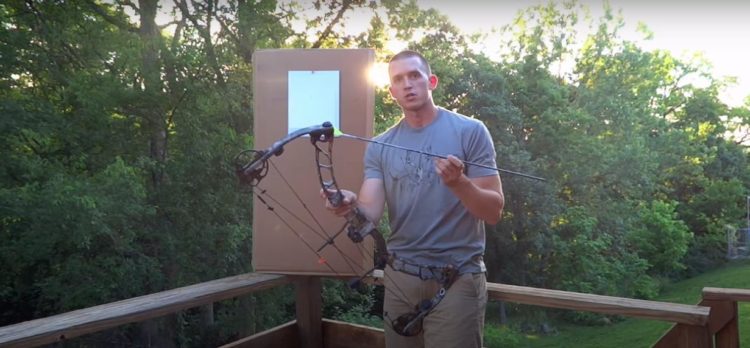
As we have discussed, tears can occur as a result of an arrow that has too weak or stiff of a spine for the bow’s setup. In the video above I discussed this with a real world example as I was setting up my Elite Energy 35 to shoot an Easton Carbon Injexion.
I knew that the 330 spines were going to be on the weak side for my 30.5″ draw length and 70+lb. draw weight – and sure enough, no matter what I did to my center-shot or nocking point I was getting indications of a weak arrow.
I resolved this by decreasing my bow’s draw weight, but there are a couple of ways to change the arrow itself to account for a strong/weak spine.
- Decreasing shaft length will stiffen an arrow, and shooting an arrow at a longer length will weaken it.
- Decreasing point/insert weight will stiffen an arrow, and adding point/insert weight will weaken it.
Keep all of these things in mind when selecting arrows.
If you know, for example, that you are on the line between two different spine recommendations, then you might want to consider going with the stiff shaft and shooting a 125 point instead of a 100 grain point, or even shooting that stiffer staff at a longer length than what you would normally “need”.
Playing with different arrow spines, lengths and point weights while shooting through paper will tell you what your bow prefers.
Never get rid of those random extra arrows, and better yet, try to pick up “leftover” or one-off arrows from friends. Always keep a variety of shafts on hand to shoot through paper and see how your bow responds.
Still Having Problems?
If you’ve followed all of the advice from above and are still having issues, then there could be several things going on.
If you’ve double-checked the recommended arrow spine for your setup, and know that your rest’s center-shot and nock height are set correctly, then it could be that your bow’s cams are out of time/sync, your limbs aren’t evenly tightened/matched, your getting fletching or contact, or it could be your form, torque, or grip pressure.
There’s More…
We have covered a TON of information on paper tuning, but be sure to reach out if you have any other questions or problems. In the coming weeks, we will also be talking about the walk back tuning and broadhead tuning. Stay tuned!